
Your Cart is Empty

Leather possesses a certain quality that makes it undeniably cool and supremely stylish.
When you see light hit it the right way, leather looks like the most luxurious material ever discovered. To be clear though, even without the benefit of great lighting, leather can look absolutely stunning.
There’s a reason why many of Hollywood’s coolest movie stars were more than happy to don leather jackets even when they were just out on the town.
Let’s also be honest though, at a certain point, black and brown leather can be kind of unexciting. The colors black and brown are classic for leather, but experimenting with other hues is a good idea too.
The good news is that you’ve stumbled upon the best guide to dyeing leather, and after reading this article, you will be equipped with all the knowledge needed to tap into the true potential of this incredible material.
It’s pretty well-established that leather is a fine material that can look spectacular without a ton of help, so why would you even consider altering it?
There are some good reasons.
First off, the conventional leather color palette is pretty limited. There are different shades of brown to dark brown that may sometimes feature red and orange undertones. Lighter leather colors almost resemble cream, while on the opposite end of the spectrum exists black leather and other variants that feature different undertones.
If you want to rock articles of leather clothing that come in those conventional colors, that is certainly a fine decision, but if you’ve been wearing black and brown leather jackets all your life, a change of pace would be welcome.
Another reason for why dyeing a leather piece of clothing is not a bad idea is because the process can breathe new life into the item. After years of wearing a leather jacket, it can get worn down and the natural color may start to fade.
It would be a shame to just retire an otherwise perfectly fine leather jacket simply because it’s losing a bit of its luster. This is why dyeing is a good option to consider.
You can use a dye that comes in the same color to essentially retouch your old jacket. Think of the dye as a revitalizing tonic that your reliable jacket has long needed.
Oh, and one more reason why it makes sense to dye leather is because it can be pretty expensive to constantly keep buying items made of that material.
Leather jackets, leather belts, leather shoes, and even pieces of furniture made out of leather aren’t exactly cheap, and that’s fine because you’re paying for quality, but replacing them can bust your budget.
It would be more economical to simply pick up some dye, some other tools and work on revitalizing your leather item yourself.
Now, speaking of tools you’ll need for dyeing…
You will need a few specific items for the leather dyeing process.
Obviously, you’ll need to have the item that will be treated ready. Later on, we’ll discuss specifically how you want to prepare the item for the dyeing process.
The leather dye is another obvious inclusion.
It’s best to stock up on your dye of choice. This is not the time to be stingy because the last thing you want is to suddenly run out of dye while you’re in the middle of completing the process.
Next up on the checklist is an applicator for the dye. If you have some old plain shirts lying around, you can cut them into smaller strips and use them. Alternatively, SFGate says that a cellulose sponge can also work well as an item that introduces the dye to the leather. Some leather dyes also come with their own applicators, which is quite convenient.
Getting an abrasive of some kind is also not a bad idea, as it will be helpful in the preparation process.
You are also going to want some oil that works well with leather on hand. There are different kinds of oils that could work here including jojoba and even olive oil. Canola and vegetable oil may work too, but it’s best to steer clear of anything that can leave a lasting odor.
The last item you’ll need to get is a leather sealer. Even if this is the first time you’ve heard of such a time, don’t worry. Different kinds of leather sealers are already available online and you can order one pretty easily.
Naturally, the leather dyeing process has some risks too.
If you skimp on getting a high-quality dye, you are putting the item to be treated at risk. By that same token, if the type of leather used in the item you are treating is not up to snuff, it may not hold up in the dyeing process, and it could end up looking worse at the end of the process.
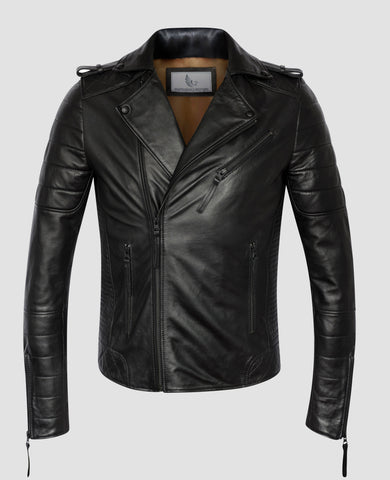
That’s why it’s a good idea to start out with a fine leather product. A leather jacket from Independence Brothers is more than capable of standing up quality dye.
The reason why you will want to have plenty of dye around is twofold.
First, there’s a chance that you will have to apply multiple coats of dye to change the color of the leather you are working with. The other reason is because the color may look uneven if there’s a significant gap of time between when the coats of dye are applied.
The dye could look blotchy if you interrupt the drying process. It would be best to just have plenty of dye ready so you can finish the application process in one go.
Now, it’s time to detail how the dyeing process should be carried out.
Assuming you already have all the items needed, we can get right to the first step of the dyeing process.
1. Get the leather stretched out
What you want to at this juncture is to straighten out the leather. Make sure that there are no spots being covered or creases forming. Use a coat hanger if you’re dyeing a jacket.
2. Wipe the leather with an oil-soaked cloth
Soak the cloth or sponge you have decided to use with the oil of your choice and then proceed to wipe down the leather surface. Spread the oil out in a thin layer evenly to ensure that material is ready for the dye.
3. Use the abrasive on the leather
Complete nice and easy brushes with the abrasive. You don’t want to damage the leather obviously. You just want to kind of agitate it a bit and open it up. By doing that, you are opening up pockets that the dye can use to seep deeper into the leather.
4. Prepare the dye
Take the leather dyes out of their original containers and place them in little, shallow bowls if you have them. Keep them within reach at all times, so that you can apply them quickly.
The amount of dye you need to have will depend on what color you’re aiming for. More dye will be needed for a drastic move shift across the color spectrum.
It’s best to just have extra dye ready too.
Dip whatever clean cloth or applicator you’re using into the dye color and then transfer it to the leather surface. Work quickly in circular motions but carefully here. You must avoid having the dye dry up on you while you’re still working or the color may look off. Don't forget to wear gloves.
6. Let the leather dry
After the dye is applied, you must let the leather dry to ensure that the color will hold. You can speed up this process by using a hand dryer, but you can also just leave it be for a couple of days.
7. Seal up the leather
The leather sealer is needed for keeping the dye where it should be. Apply it carefully and avoid using too much. Just apply enough for the first coat on the leather and that should do the trick.
8. Allow the leather to rest some more
This is just a precautionary measure, but to make sure that no surprising issues arise, let the leather finish drying and give it some more time to recover before using it again. The sealer should not take long to work its magic, but just in case it does, leaving the material alone for a little longer can’t hurt.
At this point you should already be able to see how the leather paint has altered the look of the item you just worked on and are already marveling at the transformation. That’s the magic of the dyeing process and if you have some more leather items that could benefit from some restoration, you now know what to do.
We hope that you enjoyed this guide and that you are now also capable of carrying out more leather dyeing projects. Dyeing leather can save tons of items that would have otherwise just grown old and unused, so don’t shy away from doing it more in the future.
If you found this article useful, please feel free to share it with others who need help when it comes to leather care.
Comments will be approved before showing up.

The Double Rider - On Sale Now for $399
The Statement Biker - On Sale Now for $399

The Modern Bomber - On Sale Now for $399

The Admiral Moto - On Sale Now for $399

The Snap Collar Quilted Moto - On Sale Now for $399

The Cafe Racer - On Sale Now for $399

The Journeyman Messenger Bag - On Sale Now for $169

The Technical Bomber - On Sale Now for $399
